Thursday, May 9, 2013

Burning an arduino bootloader (optiboot)

I got a few samples from Maxim (thank you Maxim) but they came "clean" without the optiboot or anything like that, so I had to burn it down. I used the minimal circuit which can be found on the picture on the right, and here is the procedure:
To burn the bootloader, follow these steps:
  1. Download this hardware configuration archive: Breadboard.zip
  2. Download the latest Optiboot library. 
  3. Create a "hardware" sub-folder in your Arduino sketchbook folder (whose location you can find in the Arduino preferences dialog). If you've previously installed support for additional hardware configuration, you may already have a "hardware" folder in your sketchbook.
  4. Move the "breadboard" folder from the zip archive to the "hardware" sub-folder of your Arduino sketchbook. If you don't have a "breadboard" folder there, create one, an put the file in it.
  5. Restart the Arduino software.
  6. You should see "ATmega328 on a breadboard (8 MHz internal clock)" in the Tools > Board menu.
  7. Upload the ArduinoISP sketch onto your Arduino board. (You'll need to select the board and serial port from the Tools menu that correspond to your board.)You'll find this under "examples".
  8. Wire up the Arduino board and micro-controller as shown in the diagram to the right.
  9. Select "ATmega328 on a breadboard (8 MHz internal clock)" from the Tools > Board menu. 
  10. Under  the optiboot directory, execute the command avrdude -P /dev/ttyACM0 -b 19200 -c avrisp -p m328p -u -U flash:w:"optiboot_atmega328.hex" :i -F
  11. After finished, use: avrdude -p atmega328P -c avrisp -P /dev/ttyACM0 -b 19200 -u -U efuse:w:0x05:m -U hfuse:w:0xDA:m -U lfuse:w:0xFF:m -U lock:w:0x0F:m -F
    otherwise the boot will be recorded/burned, but the chip will not accept uploads.


For ATmega328-PU:
If you try to bootload an ATmega328-PU, you’ll get a message something along the lines of:
avrdude: Device signature = 0x1e9514
avrdude: Expected signature for ATMEGA328P is 1E 95 0F
Double check chip, or use -F to override this check.

You could also get a more colourful version:
avrdude: Yikes! Invalid device signature.

The way to work around this is to “trick” the IDE into believing your 328-PU is in fact a 328P-PU. Disclaimer: I have tested this myself and it works – no guarantees however that you won’t have unforeseen consequences.

Workaround:
In your Arduino folder, find the subfolder: ..\hardware\tools\avr\etc
Make a backup copy of the file: avrdude.conf
  1. Open the file avrdude.conf in a text editor
  2. Search for: 0x1e 0x95 0x0F (this is the ATmega328P signature)
  3. Replace it with: 0x1e 0x95 0x14 (this is the ATmega328 signature)
  4. Save the file 
  5. Proceed as described previously (and use lock:w:0x0F:m)
  6. Restore the avrdude.conf to it's original settings
Good Luck!! Good burnings!

Wednesday, May 8, 2013

RTC shield, I²C, Arduino compatible, DIY

Hi! I'm back, again with arduino and a new shield, once more a DIY shield. 
So, let's start! The picture on the right is the circuit used to build the shield (I want to thank my friend Nuno Portela, who grabed this, and converted to eagle schematic, printing and driling the circuit afterwards).
The schematic on the left is the proposed circuit, which was then printed. All the components are easy to find, so the final result is almost inexpensive.
I've attached also a picture of the final result, 2 boards with cr2032 button cells. 
Concerning the code, I couldn't find where I got mine, so I'm posting it here.
Enjoy!

Saturday, April 27, 2013

Arduino DIY SD shield

Well... I got tired of having the arduino connected to the PC to have a logger, so did some search and ended up with this shield, it uses a micro SD card to SD converter, which is soldered to the board as you can see on picture, the components are easy to find, and they are used to low down voltage from the arduino pins (5V) to something near the 3.3V which is the correct voltage of the SD card. The red cross in the picture means you have to interrupt the circuit on those points, otherwise you would be short-circuiting the resistor. The numbers on the right (10,11,GND,3.3V,13,X,12) are the pins in the arduino board, 3.3V and GND I suppose you know what that means, and X is not connected and is used to align the plug, avoiding upside-down connections.
You can see on the left the final look, without the microSD card adapter:
And on the right side, the final look, already with the adapter soldered.

Enjoy!


Spoiler alert: DO NOT try to connect the card directly to arduino pins, without this voltage divider, you will damage the card!

Based on this shematic.

Test file here and another one here.

Monday, February 18, 2013

Virtual candle (candleuíno) with arduino

Hello! I'm back, after a (more) troubled life period, but still here.
This time I developed something more romantic, something I was looking for a long time now.
What you will need:
  • Arduino
  • A led (clear orange or clear yellow)
  • Resistor for the LED (220 Ohm would be fine)
  • An LDR
  • Resistor for the LDR (10kOhm or 1kOhm would be fine, depends the darkness you want to be triggered)
  • Hot glue stick
  • Paper
  • A wooden box
First you connect the led and resistor as you can see in the picture, you may use any digital pin as long as you change the code to output to it BUT it must be a PWM compatible pin. 
Then you do the same with the LDR, as in the picture, using Analog 0.
Now you have to take care of the LED, it must produce a diffuse light, or it wil be worthless.
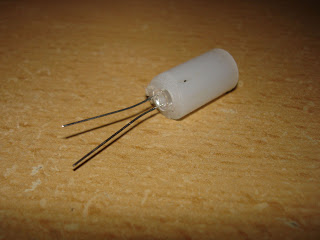
So, I used a stick of glue, cut it in about 1 cm, made a hole in it to fit the LED, and inserted it as you can see in the picture below.

I made the circuit and then uploaded to an arduino and hardwired it into a box. The resulting effect is the one in the video. Candle Vídeo
The original project can be found on this page, is slightly different from mine, but it's where I took most of the idea: ledhacker 
Now a picture of the final result:


And finally the code.

Monday, December 19, 2011

Hatchduino (egg hatcher)

Well, this project happened because of lazy chicken... That go eat, sometimes to the shopping mall, for a walk, and the eggs lay in the cold, so something had to be done!
So, the purpose of this project is to make possible to reproduce birds (in this case chickens) without the presence of the mother.

I started by building a wooden box, and isolated with silicon, then used the guide to build the power source, drilled some holes to connect the interior to the outside. At this point I had a PSU and a box, needed something to warm the box, an halogen lamp would be perfect, so got a connector and a zinc tube in the hardware store, what happens here is that the lamp warms the tube, and dissipates heat, not burning the box.

Added a computer fan (that can not be seen in the up picture) like the one on the left, that works inside the tube creating an air flow making the temperature equal all over the box. This item is needed to spread the hot-air within the box, otherwise we would have a very hot area near the lamp and a not so hot, (even fresh during winter) area in the more far point from the lamp. The fan is connected to the +12V/gnd and starts when the PSU is ON, does not have an on/off button, no need.

First tests failed, after one hour of heating the outside of the box would be warm, and the inside not in the proper temperature, so isolating was needed, used then some roofmate isolating boards, worked perfectly, less heating time, more time within the correct temperature without heating (37 degrees celsius).

To the electronic bench now!
After some research I found out that the eggs should be heated to 37/37,5 celcius degrees during approximately 21 days, during this period they should be turned twice a day, and more often on the 3 final days, a wet sponge must be inside the box to soften the egg shell, during the final period this sponge should be wetter.

Now for the electronics, I connected an arduino board as you can see on the right, with the LM35DZ inside my box, covering the temperature, and two LED's one to inform the heating on (the yellow, digital output #3) and other to tell me that heating is off (green LED, digital output #4) but the system is alive. The digital #5 is the output to set the relay on/off, using the relay shield built before, where you see "digital port 13", connect the digital #5 as referred previously.

As power source for the relay shield, you should use the +12V/gnd from the PSU, and the same for the arduino, you just have to solder two wires to a proper jack, (like the one in the right) remembering that the +12V go inside and the gnd on the outside. Arduino and relay shield MUST share the gnd, (common ground) otherwise the shield will not work.

On the left there is a picture of the final result, the temperature sensor on the right bottom of the picture, with a green surrounding, far from the lamp, within the egg area. The green arrow shows the air-flow from the fan that stands behind the lamp, distributing the hot-air in the box.

Now with all the hardware set, we need the software, and that, lays here, feel free to change it within the license authorization. Basically you set it on, it starts regarding the temperature indicator, if less than 37 degrees, sets the yellow LED and relay ON for heating purposes, when reaches a comfortable temperature, sets the relay OFF and the green LED ON, and stays controlling the temperature, and the behavior goes on and on, until the birds hatched!

I can tell you the system works fine, and as a final note I leave you the console output.

Materials used:
- Wooden box
- Roofmate isolator
- Arduino
- Old PC fan
- Homemade relay shield (see link)
- Customized PC power source (see link)
- 50W halogen lamp and connector
- Zinc pipe/tube
- Green LED
- Yellow LED
- Power jack
- LM35dz
- Wires, connectors, etc.

Feel free to contact me.

Friday, December 16, 2011

Customized ATX power supply

An old PC power supply! Who does not have one...? For my arduino project I needed a reliable and powerful power source, because of the halogen lamp used to warm the hatch box, so, layed hands on work and converted an old PSU. Let us see how!
As you all may know, these PSU's once connected to the AC power, are ALWAYS in charge, for that I connected an LED, and an other for when the power unit is really on. If your power supply has an on/off button, you can skip the switch connected to the green wire, and just short-circuit it to ground, using the native on/off button to switch on and off.
Nevertheless the left image explains the wires needed to be worked to achieve best results. Did not use the resistor.
The yellow wires are +12V, the blue -12V, the red +5V, the black GND, the yellow +3.3V, white -5V, as you can see on the next picture. You can now drill the box and use some connectors with a fuse to protect the PSU, and voilá!
I used these links, an instructable and a wikihow as an aid to the work. Good luck on your project! Feel free to contact me.

Arduino relay shield (homemade)

Hi! This is my homemade arduino relay shield, I had a spare 12V relay, and nothing to do with it, so this project happened.
The circuit is roughly the version seen in the schematic on the left, with a BC548 (NPN) transistor and a 1N4007 diode, my resistor was of 8220 Ohm.
The ground (GND) has to be the same on the arduino and on the relay shield, or it will not work.
On the picture you can see on the bottom part the + (Vcc), S (signal from arduino, any digital port), and - (GND), on top we see the connectors for NO, (normally opened) C, (common), NC (normally closed).
For the whole article, you can follow the original instructable that I based on, here.Link